From document upload to successful text generation (step-by-step explanation)
Step 1: Prepare your document for the upload
Follow our tips for successfully uploading documents, which we summarize in this article.
Step 2: Upload your document via the document upload in Brand Hub
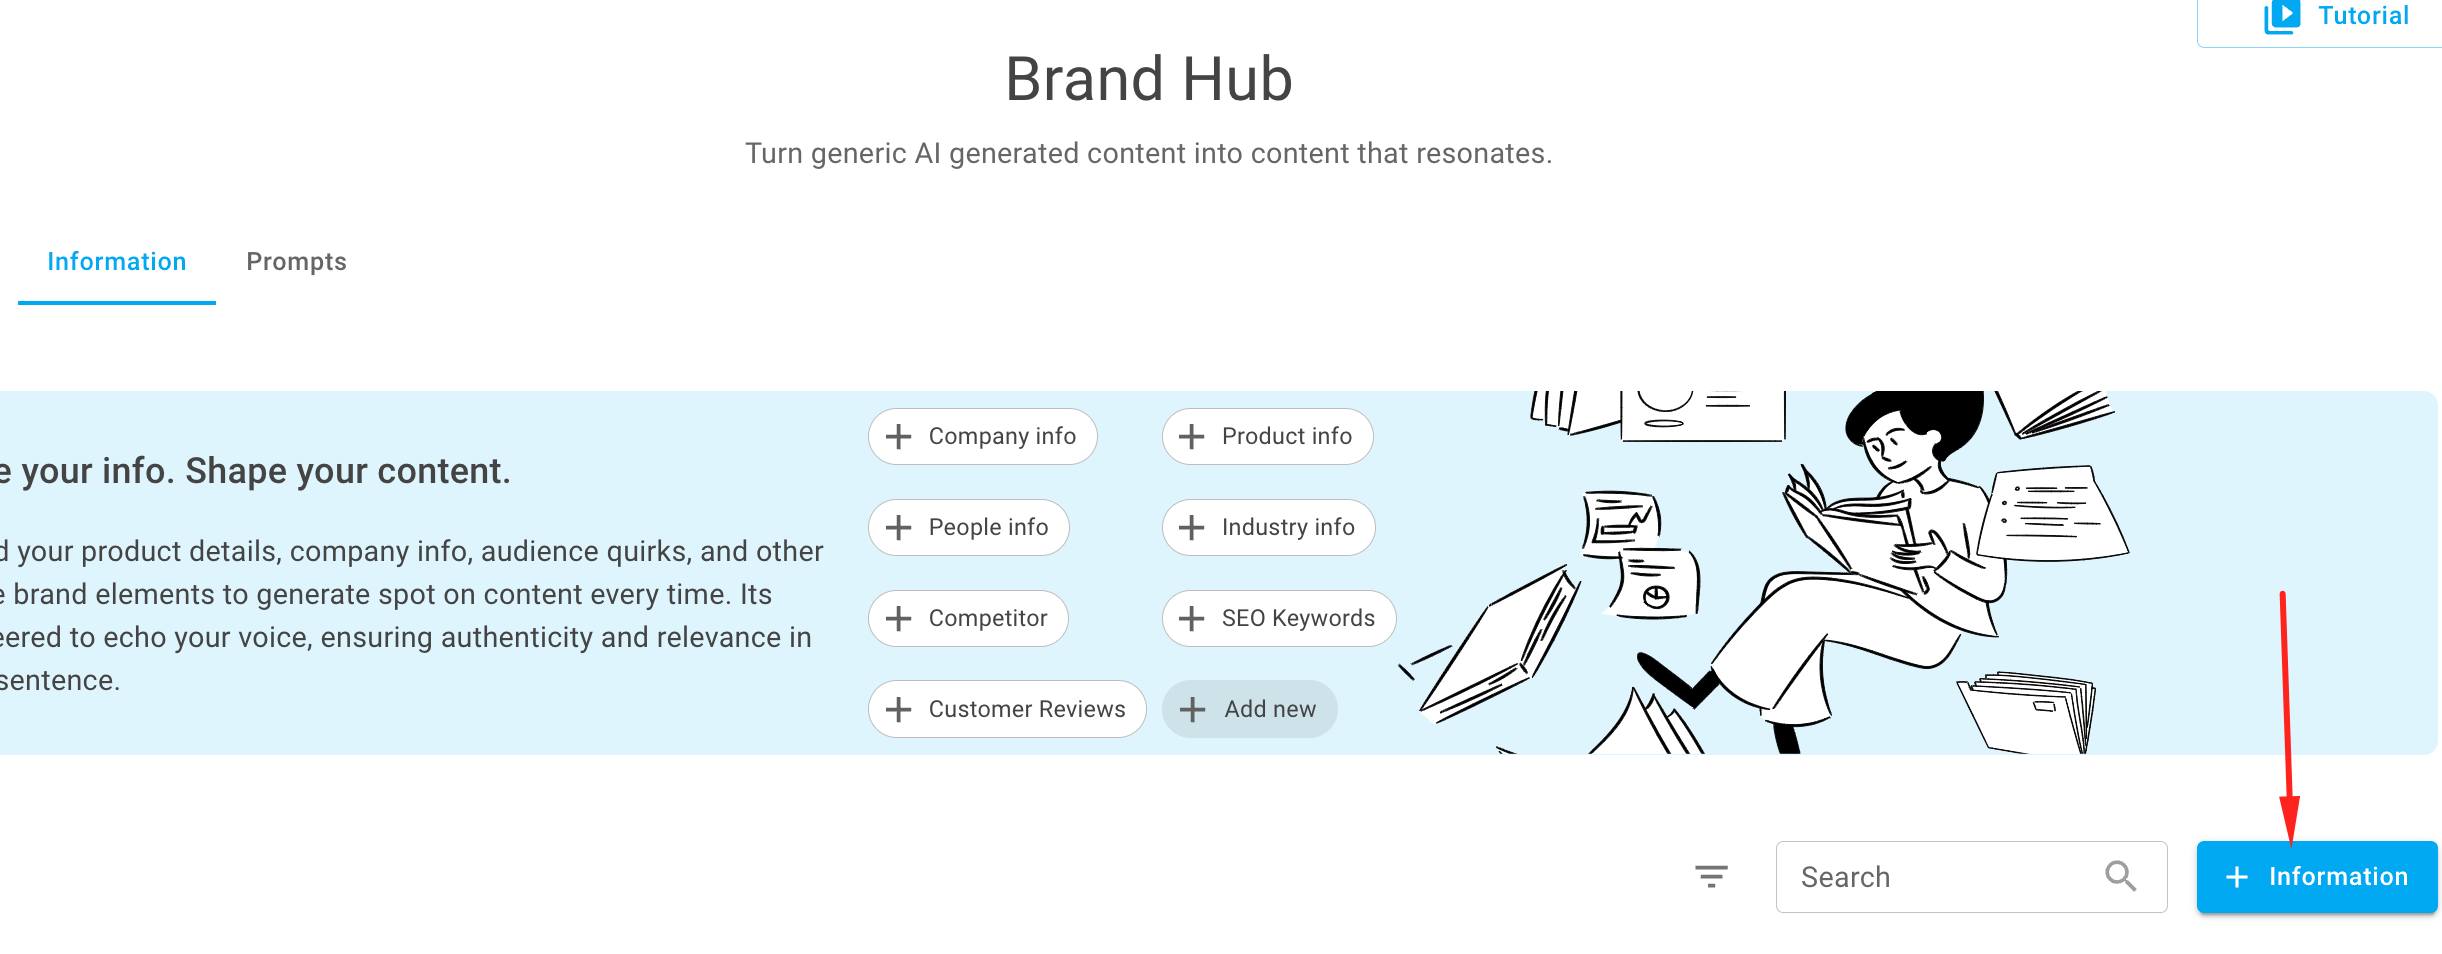
Visit your Brand Hub and switch to the "Information" tab. Click on "+ Information" to create a new piece of information:
Now select the "Upload" option:

Browse for your document or drag it into the highlighted area to save it. Give your information a name, a description and save it in the category of your choice:

Step 3: Select the document (the information) for text generation
You can have information taken into account for any text generation - regardless of whether you use text types, ChatFlash or our workflows. Below, you can see examples of how you can activate your documents (information).
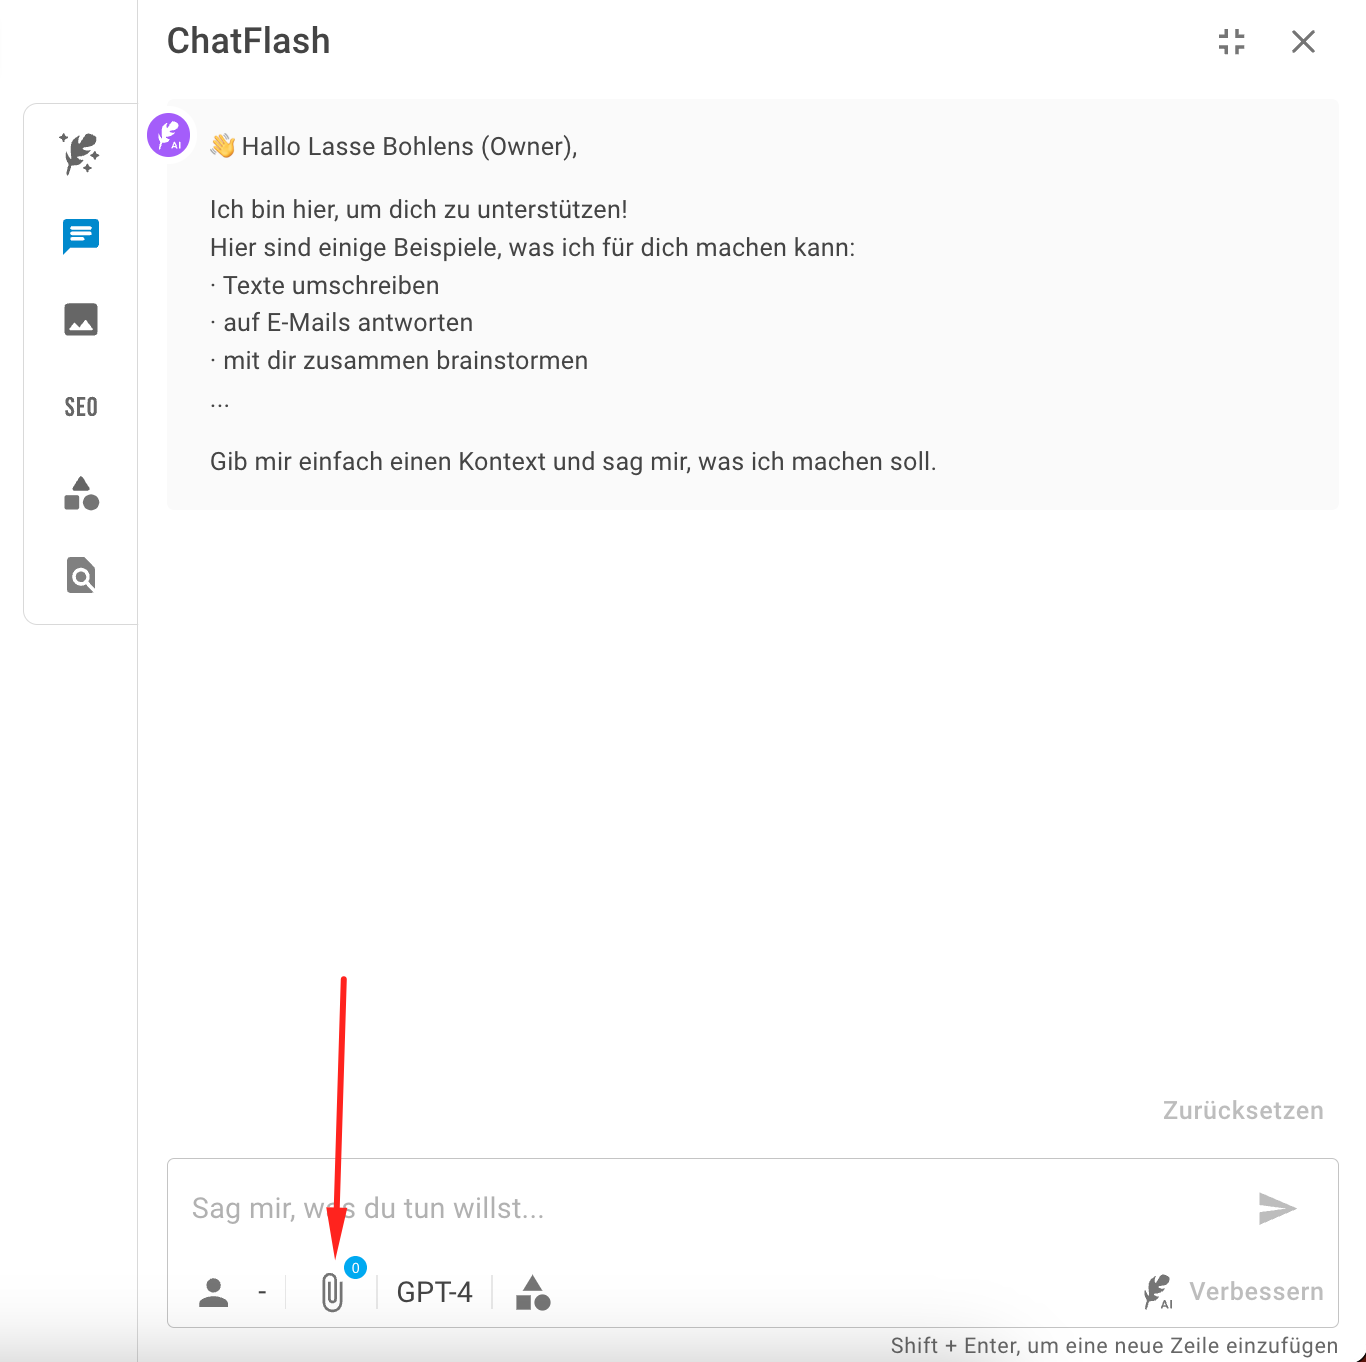
In ChatFlash:
Click on the bracket at the bottom of the chat input:
Select the document (information) of your choice and click on "Apply":

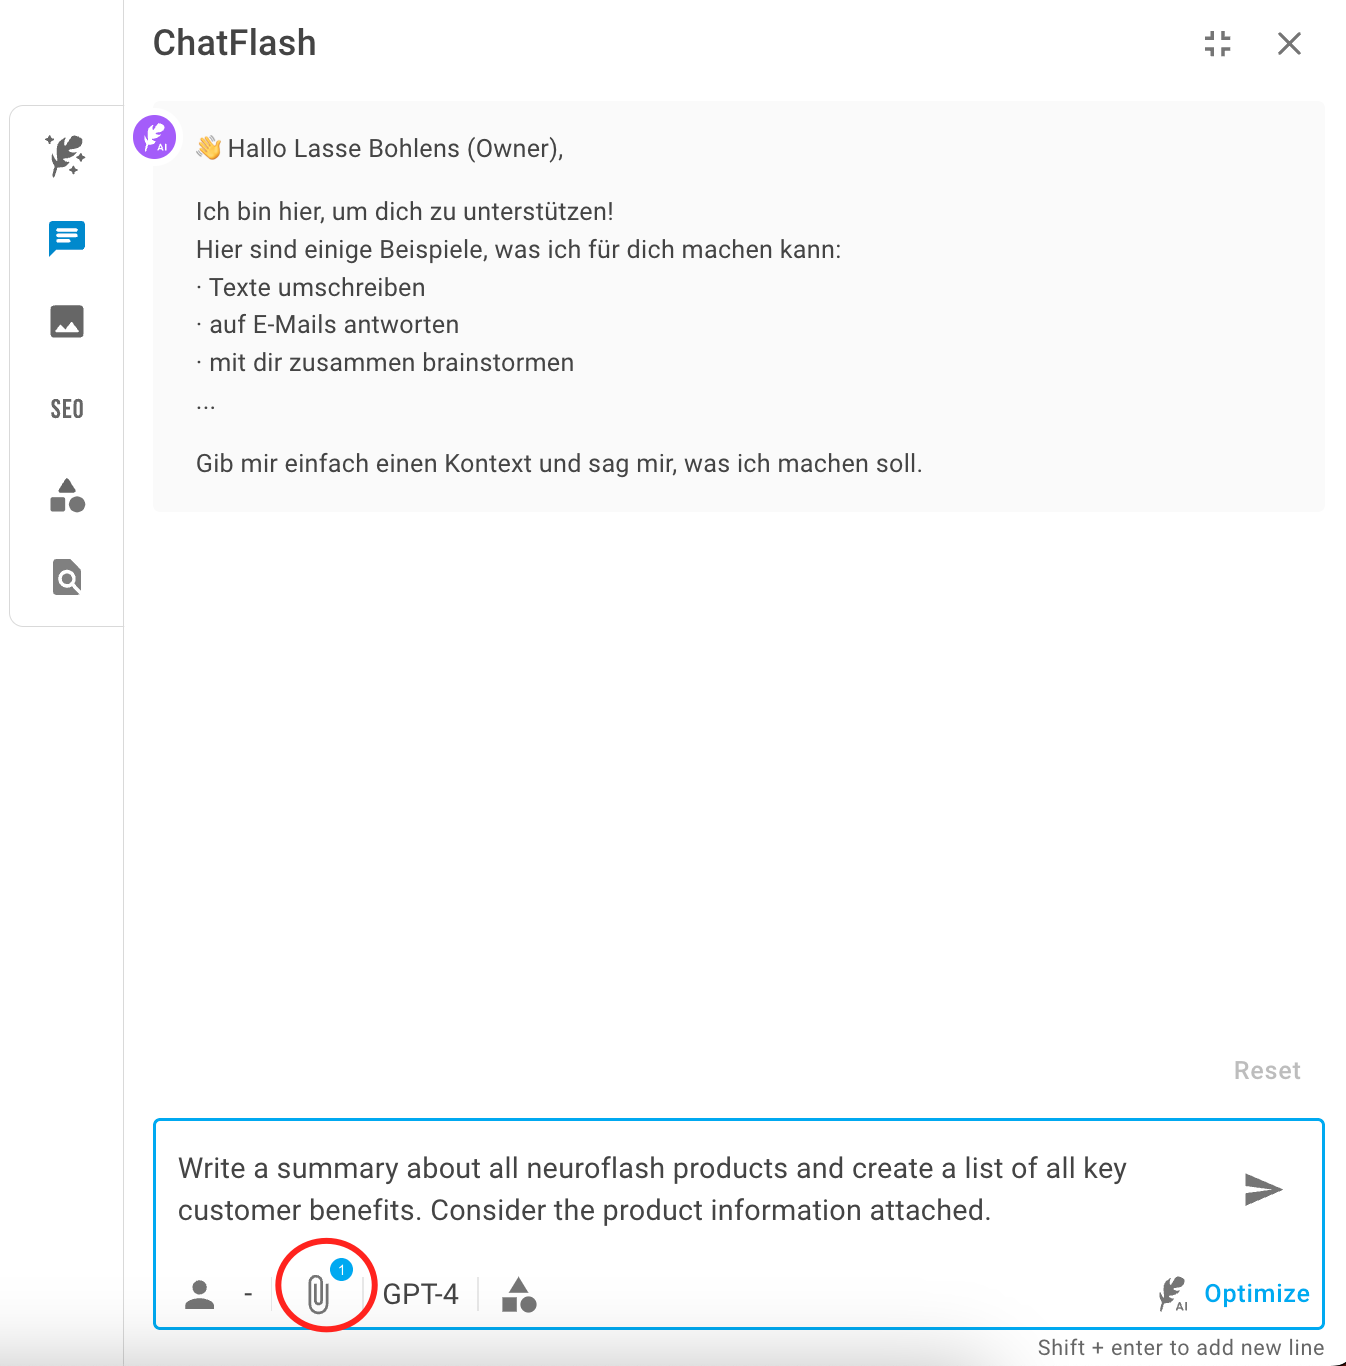
The document (information) is now stored in the chat. The number above the bracket indicates whether and if so, how much information you have attached. Now write your prompt to get a text result that refers to your attached information:
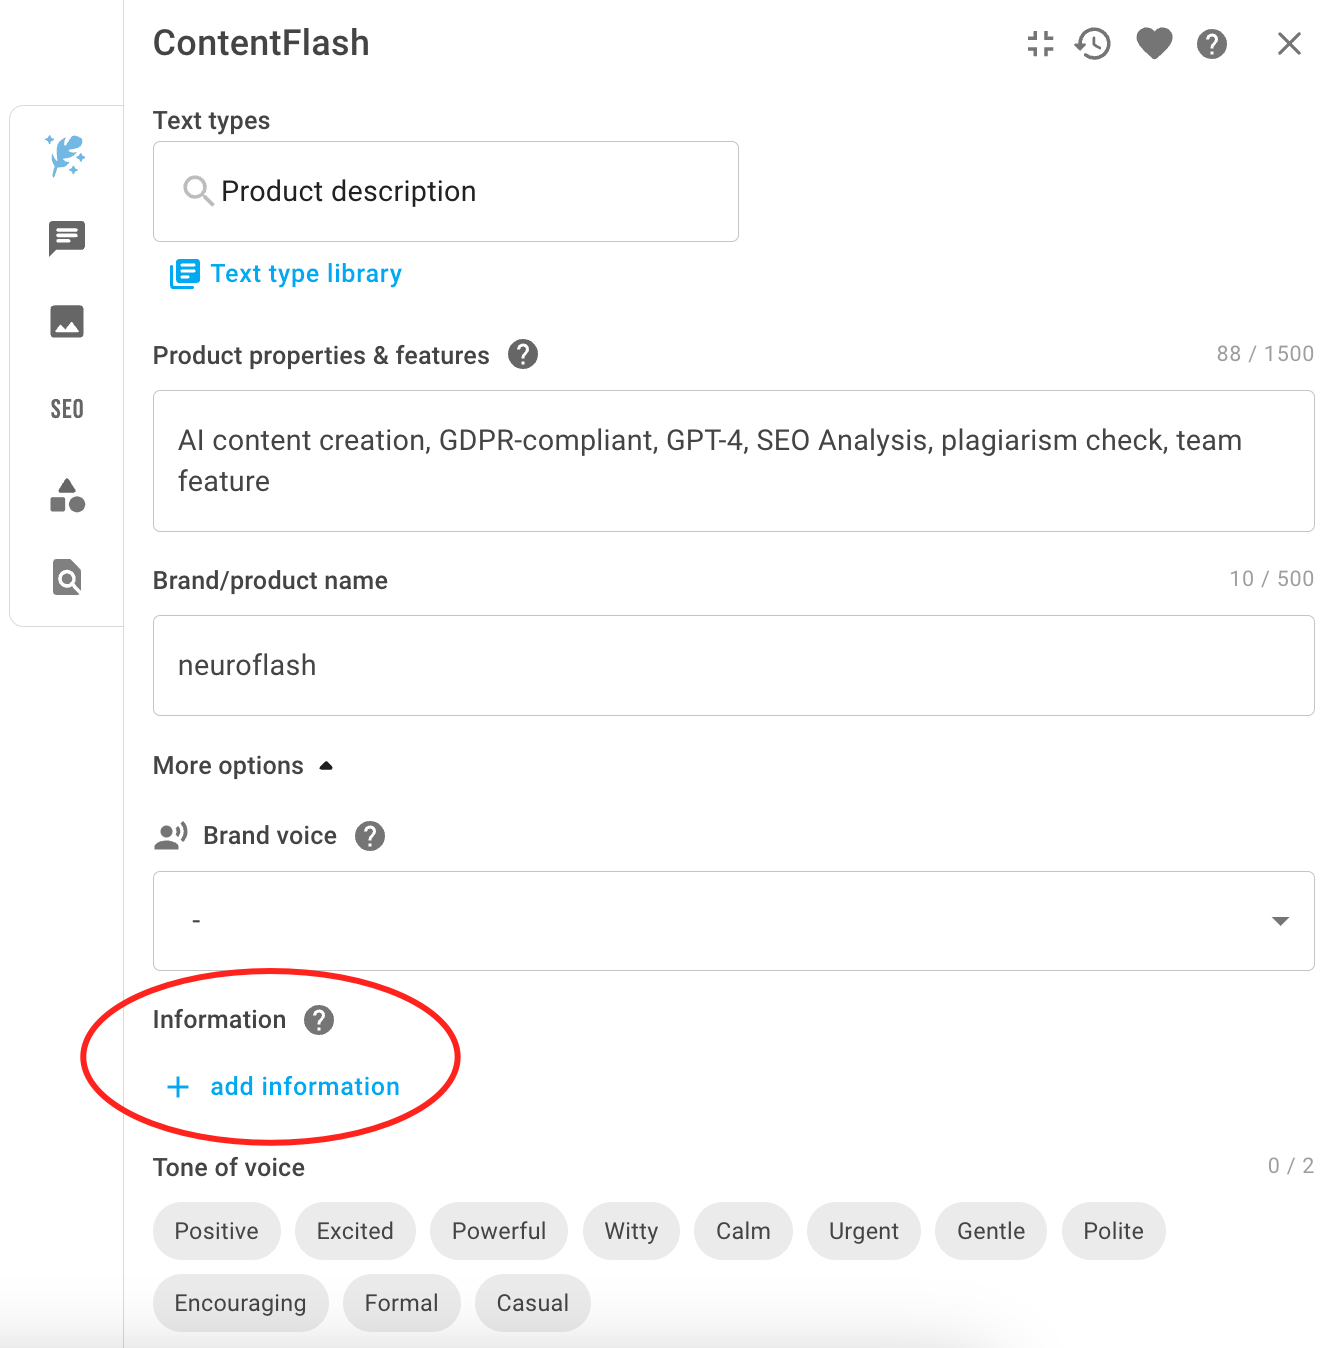
When using text types:
If you prefer to work with our text types, you will find the option to attach information in the advanced settings. You can then select your desired information in exactly the same way as with ChatFlash.
When using workflows:
In the blog article workflow, you will find the option to select information in the third step after the language setting and your topic description (+ keyword determination). After selecting your desired information, you can continue the workflow as usual.

The process is very similar for the social post workflow.